My ad

HOW TO KNOW INFECTIONS BY THE LOOKS OF POULTRY BIRDS POOP (POULTRY DROPPING)


There are many infections and deasese that can affect your bird growth and general health. These infections can be easily detected in many ways , if diseases or infections are detected earlier it will reduce lost in your farm.
  Chicken poops ( poultry dropping) is one of the important and quick way to detect infections and diseases in your farm.
The types of poultry dropping, they are normal and abnormal poops. Although, the chicken droppings (poops) can vary in shapes, colours, textures and even odour. The Main factor that contribute to that may be as a result of diet in their feeds or diseases/infections. The atmospheric conditions may be a collaborating factor as chicken drink more water in hot weather which can make their droppings watery.
By close observation, one will be able to determine if there is health problem among the birds. This may not be 100% accurate but it majorly gives insight of necessary steps to take in poultry health management. This article will be helpful in analysis of normal droppings according to the diet and other factors for you not worry unnecessarily.
Normal poultry dropping is of shade of brown, solid with a small covered white on top. The solid part is the feaces while the white part is the uric acid (urine). Other colours of droppings may range from brown to green, yellow, black, blue, orange, watery white or even red.

Below are the common colours and problems to observe in your chicken droppings (poops)

1. Yellow poop; this can possibly be caused by Coccidiosis, intestinal worms, or kidneys disease. It is most likely to be caused by intakes flowers, strawberries or tomatoes and feed that's highly rich with corn. If the symptoms persist after changing their feed, one can treat coccidiosis and deworm the birds. Read more on Poultry Medication And Vaccination.

2.  Greenish poop, This is possibly cause by intestinal worms of Marek's disease or avian flu but the most likely causes are diet rich in vegetables, herbs, grass, weeds and plants of all kinds, if not from that, one need to treat viral infection.

3. Black dropping is possibly caused by internal bleeding while the most likely cause: Ingestion of charcoal, wood ash, dark berries. Droppings can be of blue colour due to a diet rich in red cabbage or beet. You just need to ensure that you treat your birds with coccidiostat as at when due.

4. Highly liquid white manure could be caused by fungal Infection of the Cloaca, wind gleet, kidney damage due to a too high-protein diet, stress, internal disease while most likely cause is drinking of excess water due to hot weather or eating large amounts of fruit like watermelon.

5. The possible cause of Liquid Brown droppings are Infection of e. coli or respiratory system infections such as bronchitis, so the consistency of faeces will look more of a pudding and this can occur at a frequency of once every 7-8 filing of droppings, which is quite normal. If continue for long time than normal, go for treatment of viral infections.

6. Big pile of Brown droppings occurs when a hen hatches her eggs during a long period (brooding), rather than drop a dozen of droppings per day, she will hold them off until she leaves the nest and drop a few large droppings a day. Also, the first droppings in the morning can have this look right out of the dorm. This type of dropping is completely normal.

7. Orange droppings is possibly caused by coccidiosis or lead poisoning. The probable cause is inflammation of the intestinal wall. The Orange particles are sometimes confused for blood. This situation is quite normal on occasion and subsides naturally over small period of time.

On usual occasion, there is nothing to worry about the colour and texture of poultry droppings, especially if you can identify the cause. On the other hand, there are events that you will never want to see like blood in the stool which is a clear sign of coccidiosis and/or serious intestinal illness. If you suspect this, start anticoccidiosis treatment or consult you vet doctor immediately. Other one is seeing worms in the droppings which is a serious parasite disease of the intestine. Read more on Poultry Worms.

As a farmer you should be able to know and noticed all these poops sign and able to determine what kind of treatment you quickly give to your birds.

For quick update and more on poultry farming like  and follow our Facebook Page ... We materialize your satisfaction! @ backyard chicken and turkey business.

Ways to get rid of chicken mites (Lice) and prevention


Chicken mites can become deadly if left untreated, especially in chicks. When the bird scratches at the mites and creates open wounds, the other chicks are prone to attacking the bird after being drawn to the sight and smell of blood – this happens even more frequently when raising turkeys.
When you notice your chickens scratching relentlessly, losing feathers, and generally in a miserable mood? If so, they probably have mites – or poultry lice. These nasty little infestations happen frequently, especially when birds are living in close quarters. Chicken mites will not kill your birds unless untreated for an extended period of time. Thankfully, mites and poultry lice are fairly easy to both get rid of and prevent without being reduce to using potentially harmful chemical products on the flock.

What Are Chickens Mites How Can You Tell If The Flock Is Infested?
The mites and lice travel from host to host in search of a home, much like human lice. They can be transmitted from bird to bird or often times, from rodents and other animals who lived near the chicken coop and run area. Mites tend to look like little brown spots on the flesh of a chicken. An infestation almost looks like someone splattered mud onto the bird – until the “mud” starts to move about slowly on the chicken’s body. Chicken mites can also appear as little gray specks or reddish specks, on a bird’s body. The miniscule parasites have eight legs, that are far too tiny for the naked eye to see. There are two common types of chicken mites, the northern fowl mites and red roost mites. The red roost mites prefer to inhabit the coop roosts, nesting boxes, and cracks in the wood frame of the coop and run, when not making their home on a bird. The mite colonies are fairly nocturnal, they often wait until it is dark to leave their colony to leech blood from your flock. Chicken mites can afflict guinea flocks as well. The more all of your flocks are exposed to natural dirt for “bathing” or dirt “baths” created inside their run, the less likely it is a chicken mite infestation will take hold. You can keep your chicken coop impeccably clean, and still experience a chicken mites infestation.

How To Inspect Chickens For Mites

A magnifying glass and a chicken that holds very still while it is examined would be required to visually identify which type of infestation you are battling. There is really no need to inspect a bird so closely to discover if chicken mites have set up housekeeping. You merely need to learn how to identify the symptoms and signs that an infestation has occurred so you can take the necessary steps to thwart it. Only in severe and long-term cases could a chicken mite infestation cause the death or humane slaughter, of a poultry bird. Inspecting each individual chicken twice each month for signs of an infestation should serve as an early mites or lice presence warning system. When allowed to remain together, a mother hen will instinctively check her chicks for mites and attempt to remove them. How To Inspect Chickens For Signs Of Mites • Look at their vent feathers closely. If the feathers around the vent are particularly dirty, carefully look the bird’s flesh over more carefully so crawling tiny mites or lice. • Pay attention to the daily or weekly behavior of each chicken. If a bird suddenly moves about a lot less frequently or shows signs of general fatigue, look it over more thoroughly for signs of mtes. • If the chicken’s comb begins to boast a more pale hue, a mites infestation could be occurring on the bird. • if your eggs production decrease suddenly, check the hen over immediately for signs or mites, lice, or other common poultry ailments. • Weight loss is another potential indication of a mites infestation. Weighing the birds twice each month, or even once per month, will help you better gauge their overall health. • Scabs near the vent of the chicken are another indicator a mites infestation in present, and likely has been for at least a little while. •
If you chickens have white or light colored feathers, they may become darkened or discolored due to the feces dropped by the mites. • Feathers on poultry often become disheveled or ragged in appearance when they are combatting mites. • Both chicken mites and lice tend to lay their eggs on the feathers of birds, check that area closely both during and after an infestation treatment to ensure they parasites are all gone.
It is always a good idea to inspect birds weekly, if possible, and keep a health journal on each bird. Following this practice will help you determine not only if mites and lice are about, but other if other common poultry ailments are emerging and to keep track of egg production. When inspecting each chicken, pay special attention to your brooding hens. The hens are too focused on laying or sitting their eggs to take regular dust baths – which help ward of mice and lice.
If you have ever left the coop with irritated and slightly burning skin, it is likely the mites that are infecting your birds, decided to take a bite out of you, as well. How To Prevent Chicken Mites Before we delve into how to cure chickens with mites, let’s take a few moments to better understand how to prevent them (as much as humanly possible) in the first place – and make sure your coop is rid of them after an infestation has been detected. Birds and other wildlife are generally considered the biggest carriers of chicken mites and lice. If you live in an urban area and the flock is confined to a coop and run, common sense would tell you that the birds are better protected from mites than say, free range flocks. But, that does not seem to be the case. Because free range birds have more access to dust bath opportunities mites are less likely to choose them for a host. Also, because free range birds are not living in confined quarters for the bulk of their lives, bird to bird transfer of mites is also decreased. I tell you this not because I am die-hard free ranger who is blessed with the space to do so, but because all poultry keepers need to know no matter how the chickens are housed, and their are pros and cons to all methods,
EVERY flock is susceptible to some degree, of contracting mites. How you choose to raise your birds matters, but opting for one type of housing over another because it will keep the flock protected from mites and thinking your job is done, will ultimately leave the chickens more vulnerable to the parasites. •
Quarantine new additions to the flock for at least two weeks before moving them into general living quarters. Inspect the new birds daily for signs of mites, lice, and other illness. • Store feed in an airtight container to prevent mites or other unwanted pests from getting inside. I always toss 2 cups of diatomaceous earth in with every 50-pound bag of feed to ward off pests. The diatomaceous earth can also serve as a natural dewormer and detoxifying agent. The DE cuts into the hide of insects to deter their entry and also absorbs into their skin to dehydrate them, smothering the pest from the inside out. •
Remove potentially contaminated feathers found in the coop and run on regular basis. • Put fresh straw in the coop and run weekly or bi-weekly, as your budget allows. •
Clean out nesting boxes and hose down the inside of the coop, including the roosts, at least one per month.

I use a mixture of 2 tablespoons of Blue Dawn, 1 cup of cooking or carrier oil per every 2 cups of water when cleaning my coop and run. •
Keep a dust bath large enough to accommodate all of your hens filled with dirt, sand, and ideally, diatomaceous earth at all time. Dump and refresh the dirt every three months. • Sprinkle FOOD GRADE diatomaceous earth in your nesting boxes to deter mites and other parasites from making it their home. Commercial grade DE can be extremely harmful for humans and livestock to inhale. Dust will always consume the air for a few moments when pouring any type of DE. Sprinkle the DE slowly and carefully to decrease the amount of dust, pour while wearing a mask, and/or in a well ventilated area.
Chicken mite infestations can spread rapidly in brooder chicks and ducklings because of both the extreme close quarters and their apparent attraction to heat during cold seasons. Natural Treatments For Chicken Mites Sprinkling specific spices in coop feeders and waterers, as well as in a small tub to munch on free choice, should help the flock heal from the bites and sores caused by the parasites.

You can use the following herbs and dried flowers to treat parasite infestations and other common poultry ailments

1. Garlic – The multi-purpose natural healing food/spice has been known to work superbly at repelling multiple types of parasites in livestock both small and large.
2. Cayenne Pepper – This spice is routinely regarded as a strong natural parasite killer.
3. Calendula – Dried petals from this flower have been known to help ward off and treat parasite infections. Calendula may also reduce blood clots and help reduce soft eggshell laying by hens.
4. Cinnamon – It boasts natural immune system compounds and is known to help reduce inflammation while also working as a natural antifungal agent.
5. Turmeric – This spice is often regarded as a strong natural antibiotic and also possesses anti-inflammatory compounds. It can also help treat the swelling associated with bumblefoot and enhance the immune system of brooding hens in particular.
6. Ginger – I use ginger regularly with my flock because of its natural healing properties and the belief that the spice can help harden egg shells and perhaps increase egg production.
7. Oregano – The spice is another great immune system booster with healing properties. It may also help fend off the deadly coccidiosis, avian flu, and poultry respiratory illnesses.
8. Black Pepper – This spice has antibacterial and antioxidant properties that can help chickens (other livestock and humans as well) heal both naturally and more quickly from various injuries and illnesses.
9. You can also rub the birds down with apple cider vinegar, cooking oil, mineral oil, or your favorite carrier oil, to smother the chicken mites. Natural Chicken Mites Spray Ingredients • 2 ounces of garlic juice • 16 ounces of water • 1 teaspoon of any of the two following spices: cinnamon, lavender, coriander, thyme, basil, bay leaves, spearmint, or cloves. Directions 1. Mix all ingredients together and pour into a squirt bottle. 2. Spray the flock once each week as a preventative or twice each week once an infestation has been detected. 3. Store the mixture up to 1 month in a cool dry place. No matter how hard you try to avoid it, mites will almost certainly infest at least a few members of your flock.
The tips above will help you both decrease such occurrences, help you detect infestations early, and aid in the removal of the parasites. Once chicken mites have been found on a single bird, treat the entire flock, even if the other hens and roosters show no visible signs of the parasites. Once the birds have been treated, remove them from the coop and run temporarily and thoroughly clean and disinfect the entire area before allowing the flock to return. Having trouble getting rid of chicken mites in your flock?
You can share details about your problem in the comments section below and we will try to help you figure out a way to help your chickens get rid of the vile parasites.
You can also share this post to other poultry farmer.

11 Common Chicken diseases that every poultry farmer should Know and how to treat them

Are you a poultry keeper or poultry farmer ?
  However, part of raising chickens is understanding how to recognize and treat some of their common illnesses. Today, that is what I’m bringing to you.
Let’s get started
1. Fowl Pox . If you notice that your chickens develop white spots on their skin, scabby sores on their combs, white ulcers in their mouth or trachea, and their laying stops then you should grow concerned that your chickens are developing Fowl Pox. There are treatment options for Fowl Pox. You can feed them soft food and give them a warm and dry place to try and recoup. With adequate care, there is a great chance that your birds can survive this illness. If you would like to remove the odds of your birds even contracting this disease there is a vaccine available. If not, know that they can contact this disease from other contaminated chickens, mosquitos, and it is a virus so it can be contracted by air as well.
2. Botulism . If your chickens begin to have progressing tremors you should grow concerned. If your chickens have botulism the tremors will progress into total body paralysis which does include their breathing. It is a serious disease. You will also notice their feathers will be easy to pull out and death usually occurs within a few hours. But what can you do about it?
Well, there is an antitoxin that can be purchased from your local vet. Though it is considered to be expensive. However, if you notice the disease early enough you can mix 1 teaspoon of Epsom salts with 1 ounce of warm water. You can give it to them by dropper once daily.
If your chickens have contracted this disease it means that there has been some type of dead meat left near their food and water which contaminated it. Which means this disease is avoidable as long as you keep your chickens in a clean environment and clean up any dead carcass from around their environment.
3. Fowl Cholera. You should be suspicious of this disease if you see your birds begin to have a greenish or yellowish diarrhea, are having obvious joint pain, are struggling to breathe, and have a darkened head or wattle.
Fowl Cholera is a bacterial disease that can be contracted from wild animals or food and water that has been contaminated by this bacteria. But the downside to your chicken developing this disease is there is no real treatment. If by some chance your chicken survives, it will still always be a carrier of the disease. So it is usually better to put them down and destroy their carcass so it will not be passed. But there is a vaccine for your chickens to prevent the disease from ever taking hold.
  4. Infectious Bronchitis . This disease hits close to home because it wiped out half of our flock when we were new to raising chickens. You’ll recognize this disease when you begin to hear your chickens sneezing, snoring, and coughing. And then the drainage will begin to secrete from their nose and eyes. Their laying will cease too. But the good news is you can get a vaccine to stop this disease from impacting your chickens. However, if you decide against that then you will need to move quickly when seeing these signs. Infectious Bronchitis is a viral disease and will travel quickly through the air.
To treat Infectious Bronchitis, give your chickens a warm, dry place to recoup. I gave my birds a warm herb tea and fed them fresh herbs, which seemed to help.
5. Infectious Coryza . You will know that your birds have caught this disease when their heads become swollen. Their eyes will literally swell shut and their combs will swell. Then the discharge will begin to flow from their eyes and noses. They will stop laying and will have moisture under their wings.
Unfortunately, there is no vaccine to stop this disease. Once your chickens contract this disease they should be put down. If not, they will remain a carrier of the disease for life which is a risk to the rest of your flock. Be sure to discard the body afterward so no other animal becomes infected by it. However, the light at the end of this tunnel is that even though this disease is a bacteria it only travels through contaminated water, other contaminated birds, and surfaces that have been contaminated with the bacteria. So if you keep your chickens protected from other random chickens and keep their coop and water clean they should be safe from this disease.
6. Marek’s Disease : This disease is more common in younger birds that are usually under the age of 20 weeks. So you will know that this disease has struck your baby chicks if you begin to see tumors growing inside or outside of your chick. Their iris will turn gray and they will no longer respond to light. And they will become paralyzed. Unfortunately, this disease is very easy for them to catch. It is a virus which means it is super easy to transmit from bird to bird. They actually obtain the virus by breathing in pieces of shed skin and feather from an infected chick.
And sadly, if your chick gets this disease it needs to be put down. It will remain a carrier of the disease for life if it survives. However, the good news is there is a vaccine and it is usually given to day old chicks.
7. Thrush: Thrush with chickens is very similar to thrush that babies get. You’ll notice a white oozy substance inside their crop (which is a space between their neck and body.) They will have a larger than normal appetite. The chicken will appear lethargic and have a crusty vent area. And their feathers will look ruffled. It is important to mention that thrush is a fungal disease.
This means it can be contracted if you allow your chickens to eat molded feed or other molded food. And they can also contract the disease from contaminated water or surfaces. Though there is no vaccine, it can be treated by an anti-fungal medicine that you can get from your local vet. Be sure to remove the bad food and clean their water container as well.
8. Air Sac Disease : This disease first appears in the form of poor laying skills and a weak chicken. As it progresses, you will notice coughing, sneezing, breathing problems, swollen joints, and possibly death. Now, there is a vaccine for this illness, and it can be treated with an antibiotic from the vet.
But it can be picked up from other birds (even wild birds) and it can be transferred from a hen that has it to her chick through the egg. So just keep an eye out for any of these symptoms so it can be treated quickly and effectively.
9. Newcastle Disease : This disease also appears through the respiratory system. You will begin to see breathing problems, discharge from their nose, their eyes will begin to look murky, and their laying will stop. Also, it is common that the bird’s legs and wings will become paralyzed as well as their necks twisted. This disease is carried by other birds including wild birds. That is how it is usually contracted. But if you touch an infected bird you can pass it on from your clothes, shoes, and other items. However, the good news is that older birds usually will recover and they are not carriers afterward.
But most baby birds will die from the disease. There is a vaccine for the disease .
10. Mushy Chick: This disease obviously will impact chicks. It usually shows up in newly hatched chicks that have a midsection that is enlarged, inflamed, and blue tinted. The chick will have an unpleasant scent and will appear to be drowsy. Naturally, the chick will also be weak. So this disease doesn’t have a vaccine. It usually is transmitted from chick to chick or from a dirty surface where an infected chick was. And usually, it is contracted from an unclean area where a chick with a weak immune system contracts the bacteria. There is no vaccine for this disease, although sometimes antibiotics will work.
But usually, when you come in contact with this disease you will need to immediately separate your healthy chicks from the sick ones. Use caution as the bacteria within this disease (such as staph and strep) can impact humans.
11. Pullorum:  This disease impacts chicks and older birds differently. The chicks will show no signs of activity, have a white paste all over their backsides, and show signs of breathing difficulty. Though some will die with no signs at all. However, in older birds, you will see sneezing and coughing on top of poor laying skills.
This is a viral disease. It can be contracted through contaminated surfaces and other birds that have become carriers of the disease. Unfortunately, there is no vaccine for this disease and all birds that contract the disease should be put down and the carcass destroyed so no other animal will pick up the disease.
12. Avian Influenza Avian Influenza is most commonly known as the bird flu. It was one of my initial fears of owning chickens because all you hear about on the news is how people get sick with bird flu from their chickens. However, after knowing the symptoms you’ll be able to put that fear to rest. You need to know how to act quickly if you are afraid your backyard birds have come in contact with it. So the signs you will notice will include respiratory troubles. Your chickens will quit laying. They will probably develop diarrhea. You may notice swelling in your chicken’s face and that their comb and wattle are discolored or have turned blue. And they may even develop dark red spots on their legs and combs. Unfortunately, there is no vaccine and the chickens infected will always be carriers. Wild animals can even carry the disease from bird to bird. Once your birds get this disease, they need to be put down and the carcass destroyed. And you will need to sanitize any area that the birds were in before ever introducing a new flock. Use great caution because this disease can make humans sick. And here is a great resource about avian influenza for all backyard chicken keepers. Hopefully, this will help to put your mind at rest about this disease and your backyard flock.

What to do and how to raise your day old chicks, which is call Brooding in poultry.


Laying pens or cages are used for pullets and hens from the time they start laying until they are culled and sold at the end of the laying period (up to 78 weeks). Types of Brooding Natural brooding Artificial brooding Natural Brooding The natural method of brooding is used on farms where only a few chickens are raised each year. Depending on her size, a hen will brood 15-20 chickens. The broody hen will provide all the warmth required by the chicks. Before placing the chicks with the hen she would be examined for her good health and free from lice, tick and other ectoparasites. Artificial Brooding Artificial brooding can be defined as the handling of newly born chicks without the aid of hens. It is accomplished by means of a temperature-controlled brooder (foster mother). Artificial brooding has several advantages over the natural method, which are: Chicks may be reared at any time of the seasons. Thousands of chicks may be brooded by a single person. Sanitary condition may be controlled. The temperature may be regulated. Feeding may be undertaken according to plan.
I will discuss how you can raise your Chicks from day old to adult. Which is call Brooding in Poultry Production. Brooding is defined as the management of chicks from one day old to about 8 weeks of age, and it involves the provision of heat and other necessary care during chicks’ early growing period. Brooding units are designed to house chicks from one day old until they no longer need supplementary heat (0-8 weeks). Growing pens are used from the end of the brooding period until the broilers are sold or the pullets moved into permanent laying houses (up to 20 weeks).
The essentials of a good brooder are:
A dependable mechanism for controlling temperature and regular supply of fresh air, dryness, adequate light, space, easy disinfection, protection against chick enemies, safety from fire, and economic in construction.
Management of Chicks in the Brooder Adjust the temperature as per requirement of the chicks. In case of oil heating, see that there is no defect in the stove or lamp. Chicks should not have access to the heated parts of the lamp at any cost.
Avoid a damp poultry house. You can use a deep litter system. Discourage litter eating by the chicks, scatter mash over egg case flats when the chicks are first taken out of their boxes. Provide balanced standard mash.
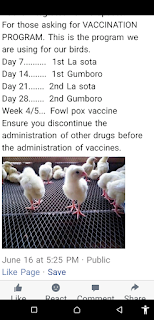
Keep provision for the entrance of fresh air. Provide clean, fresh water in front of the birds at least twice daily. (Read about the importance of water in poultry farming) Chicks, after 3 weeks old may be provided chopped green grasses (to increase Vitamin A intake) Clean the brooders including feed hoppers daily. Follow a regular vaccination program. Avoid overcrowding as this will lead to slow growth and mortality. (Read 10 ways of preventing or reducing high mortality rate in poultry farming) Keep the brooder in such a place that cold wind and rain does not get in.
Daily inspect the condition of birds and their faces for any sort of abnormality. Keep in touch with any veterinarian for the help at the time of need. It is always advisable to check the fittings, temperature control, feed and water trough arrangement before shifting the chicks in the brooder. Also Read: 5 Common Mistakes Some Poultry Farmers Make During Brooding Key Equipment Required for Successful Brooding While brooding is an important management practice in poultry production, it is important to know the required brooding equipment. Remember, the purpose of brooding is to raise healthy chicks and provide the required heat (mimicking natural mother hen) until they are able to adapt and regulate their body temperature to the ambient temperature. For brooding to be successful, there is some equipment that must be available in the brooder house/pen. Key brooding equipment includes: Brooder Guard Brooder or Heater Thermometer 1. Brooder Guard Brooder guard is a hard board that can be made to form a ring or circle with ease. A brooder guard is used to restrict the movement of chicks within a certain heated area. Normally, a poultry farmer should place 100 chicks within a brooder guard having a diameter of 1meter.
A brooder guard is not required if brooding is done in battery cages. 2. Brooder or Heater Many kinds of brooder or heater exist. However, there are four common brooders or heaters: i. Charcoal / Kerosene Stove This type of brooder is the best option when or where electricity is not available. A fabricated charcoal or kerosene stove uses charcoals or kerosene to generate or produce supplementary heat to warm the chicks. ii. Hover This type of brooder is commonly used on most standard farms. Its heating unit has a 250-watt bulb—usually five well-arranged incandescent bulbs or infra-red bulbs with a power on/off switch or button. The hover is usually covered by an angular or round metal sheet to deflect the produced heat back to the floor.
The hover is suspended using a cable or cord fastened to the ceiling, and it can be lowered or raised to any height level, depending on the required temperature. iii. Electric Brooder This is a thermostatically-controlled heater that is capable of spreading heat uniformly above a large area. The advantage of this kind of heater is that it prevents chicks from crowding under the heater or brooder directly. iv. Gas Brooder This type of brooder, unlike the electrical brooder, uses gas to generate heat. v. Infrared Bulb Heater An infrared bulb heater is also used to generate the heat required by the chicks to keep their body warm. vi. Automatic Heater An automatic heater has an enclosed 600-watt heating element with a thermostat and reflector. It is hung just like the way a hover is hung.
3. Thermometer It is important to have a room thermometer inside the brooding pen or house. It is used for monitoring the ambient temperature inside the brooding house. With the help of the room thermometer, you will know if the temperature within the brooding house is cold, moderate or high. How To Brood Chicks And Turkey Poults How To Prepare for Brooding About two weeks before your chicks or poults (turkey) arrive, check the house properly for any crack or leak. Mend as necessary then thoroughly wash and disinfect and fumigate the inside of the house with a suitable disinfectant (quaternary ammonia) and leave the house to rest. Two or three days before arrival, cover the floor with suitable litter material about 7.5cm deep.
On top of this, place rough thick paper. Place the brooder box in the middle and then arrange feeding and watering equipment radial from the center of the hover. The feeder should be half under the hover and half outside. All these equipment are then enclosed by a brooder ring 45cm high.
This guard can be made from strong cardboard paper. Check all heating and lighting equipment to ensure that they are working properly. Two hours before brooding starts, feed should be placed in feed-trough. The drinkers which should have been thoroughly washed is filled with clean cool water.
On arrival of the chicks, they should be rapidly unboxed and inspected individually for defects and quickly placed under the brooder, they should be closely watched to ensure that they receive adequate heat and are not subjected to draught. The behavioural reactions of the chicks will suggest whether the artificial heat is adequate or whether there is a draught. When chicks or poults huddle under hover or near source of heat, there is inadequate heat, where they move far from the source of heat, there is excessive heat; when they evenly spread, then there is adequate heat. When all the chicks huddle to one side, then it shows there is draught.
Temperature
Requirement for Broilers DayTemperature 1-432.3-38oC 5-1429.4-26.7oC 21-2826.7-21.2oC 28-5618.3oC Floor Space Requirement for Broilers AgeFloor space cm2 Week 1100-120 cm2 per chick Week 2-4250-300 cm2 per chick Week 5-8700-800 cm2 per chick These indicate the need for expansion of space as your chicks grow older and bigger (increase in body size). Adequate ventilation: Ventilation of the brooder house is restricted for the first 1-2 weeks. For the first four days of brooding, the chicks are supplied feed in shallow feeders like egg trays or thick sheets of papers. Fresh water are supplied every day. Apart from managing the chicks by regulating temperature, ventilation and providing feed, there are certain routine daily operations which must be followed in the same sequence from morning till evening:
Remove all dead chicks from the flock to prevent cannibalism and possible infection by pathogenic organisms. Fresh feed is supplied and constantly activated with hand. Drinkers are taken out and washed thoroughly before being filled with clean cool water.
There are some special operations which in short run are stress inducing but in the long run confer some overall advantages. These include de-beaking or beak trimming, deworming and vaccination. Feeds and Feeding During Brooding Broilers
The following is the feeding regime for broilers Day 1 – Week 4 = Broiler Starter Week 5 – Week 8 and above = Broiler Finisher .

HOW TO KEEP AND RAISE GUINEA FOWL

Guinea fowl are quite a bit different from chickens in appearance and behaviour. In this article, I will try to outline in what ways guinea fowl are different and why, how and where to keep and raise them. To give you a hint - they will do most of the keeping and raising by themselves

Story of Guinea fowl: Guinea fowl originate in Africa and have been domesticated there before they were introduced to other parts of the world. There are several species, but the type most often kept is the helmeted (pearl grey) guinea fowl. They thrive in warm, dry climates but can live pretty much anywhere with a little added weather protection. Guinea fowl are independent, efficient flyers and incredibly hardly - in two years, I have never had a sick guinea fowl.

There are quite a few advantages to keeping guinea fowl. They are pretty, interesting and fun to watch. They are also famous for gobbling up huge amounts of pesky pests, most notably ticks, while leaving most of the vegetation alone. They eat pretty much every creepy crawly they can find. I have also seen them catch mice and small snakes, which brings me to the next advantage: Guinea fowl form a feathered alarm system for your backyard! They raise a deafening alarm at anything threatening or out of the ordinary, such as snakes, dogs, predators, intruders and anything else they find suspicious. Often, one of them will sit in a tree on the lookout while the rest forages. When they see something new, they will approach it cautiously and surround it, a very entertaining sight:

My guinea fowl are they only animals that are 'allowed' out of my fenced enclosure. Actually, there isn't much I can do about it. They are excellent flyers and as soon as they are big enough, they are on top of the fence and out into the wide world! They will often separate into smaller groups and comb the environment for tasty bugs, keeping in constant contact with each other by calling loudly. They are very good at noticing and escaping from predators and I very rarely lose one. When a predator approaches, they immediately fly up and back over the fence, raising high alarm. They never stray far and always come back. They do not sleep inside but feel safer in trees or on top of the fence. Sometimes it seems as if they never sleep, I hear them calling at all times of day and night.

And yes, I have to admit that many people will see this as a major disadvantage to guinea fowl - the incessant screeching! They are always making noise. There is the alarm screech, the lookout shout, the contact call, the general chatter... This can be a problem if you are keeping them in an urban backyard - they will drive your neighbours crazy, and possibly yourself as well. Due to their travelling habit and loud calling, guinea fowl are probably best suited to a more rural setting. If you have a very large backyard and your neighbours are some distance away though, you would probably be fine with them.

The appearance of the guinea fowl has been described by some as goofy, weird or even ugly - but I think they are beautiful! They have lovely, finely spotted feathers, and while the bald, helmeted blue or white head might take some getting used to, there is beauty in that too. Males and females are very similar looking. Often males will have bigger wattles (red appendages by the sides of the head) and helmets, but the surest way to differentiate is by voice: females make a distinct, two-note call while males only chatter in one note. There is some variety in colours: besides the traditional pearl grey there is white, lavender, purple, blue, pied and many others.

Guineas lay a small, brown, pointy egg with a very hard shell. I personally have not tried to eat them because I wanted to hatch them, but I have been told they taste similarly to chicken eggs. They lay from early spring to late summer, taking a break over fall and winter. I wanted them to hatch their own eggs, and after some false starts trying to find a good nesting site, my female indeed settled down on 15 eggs and hatched an equal amount of chicks (keets) after 28 days! Male and female guinea fowl form a strong bond and the male was always standing watch over the female sitting on the nest. After the keets hatched, the male and female raised them together, always staying close to each other. They were a real family unit. Even now the keets are all grown up, they are always together and the big male still retains the role of protector, chasing away any chickens or cats that come too close to his brood.

In addition to the entertainment factor, the pretty feathers, the alarm function and the bug destruction, guinea fowl are very edible. I keep my birds purely as pets, but it would be very well possible to raise them for meat. The taste is often described as a cross between chicken and pheasant. They are a popular source of meat in Africa, but are also frequently eaten in other parts of the world.

Lastly, a bit of myth-busting: I have often heard guinea fowl described as stupid birds, frequently falling prey to predators, and bad mothers, leaving the nest before all their keets have hatched. I have found this to be not true at all! On the contrary, they are very clever, watchful and form tight family bonds. I believe people might experience guinea fowl being less than efficient when they are kept in a way that is not natural for them. Caged guinea fowl are often stressed and will pace back and forth, back and forth in a futile attempt to find an exit. Male and female guineas mate for life and watch out for each other. If this bond is broken and the male is separated from the female when she is brooding, I can imagine her panicking and leaving her nest. They are flock birds, still more wild than domesticated, and will always find security in numbers, functioning best in a large group that is free to roam.

So, if you have a large space and want an interesting looking bird that eats a lot of bugs and takes on the task of a feathered watchdog – guinea fowl are the way to go, they are easy to raise and they also feed on poultry feeds.

Ways to sex baby Chicks if they are Roosters or Hens


  A very common question is my chick is a rooster or a hen and how to sex baby chickenss. In this article, we will discuss some ways you can tell when it comes to sexing chicks!

When it comes to getting chicks, one of the most exciting parts is waiting until your pullets grow up to be layers.

But t’s pretty much a given that at some point in your chicken keeping career, you’re going to wonder about the chicken sex: whether the chicks you picked up at the local farm store are really pullets (which will grow up into hens), OR little roosters in disguise.

We’ve all been there – thinking our chicks will be great layers, only to find out 7 months later, it would take an act of God for them to lay eggs.

There are some ways you can tell if your chick is a rooster or hen and how to sex baby chickenss – they’re not 100% accurate but they’ll help you take a good guess.

Chicken sex: How do I tell whether my chick is a rooster or a hen? There’s a few ways:

1. Check the vent
2. Look at combs & wattles
3. Watch feather growth
4. Look at down color
5. Examine behavior
6. Listen for crowing

1. Check The Vent

Now, before I explain this one, let me state for the record that unless you’ve gone through extensive training to vent sex chickens to tell if your chick is a rooster or a hen, I suggest skipping this step.

Vent sexing involves squeezing out manure (if needed) then checking the vent for male or female “parts,” and it’s the only 100% surefire way to tell if your chick is a rooster or a hen.
However, as you can imagine, this is fairly invasive, and you could possibly permanently harm or kill your chick – so I would leave this method to the experts.
Professionals who sex chicks for a living go to school for years to learn how to do it properly.

Look at Combs & Wattles

While this is definitely not a 100% surefire way for how to tell a rooster from a hen (some roosters are pretty androgynous and some hens like to crow), I’ve found it to be pretty accurate.
The comb of one chick is more pronounced than the other chick. This is a fairly accurate indicator that the chick with the more pronounced comb is likely a rooster.

Another indicator is the wattles.

In young roosters, the wattles grow longer faster, and are redder than pullets. So, if you start to notice your chicken’s wattles when they’re fairly young, it’s possible you got a rooster in your hatch!
Note this only works with breeds that grow regular combs – so pea comb breeds might not exhibit these characteristics at a young age.

Watch Feather Growth

Feather growth is another way you can try for how to sex baby chickens. Female chicks – aka pullets – grow feathers faster than males. Learn more about chicken feathers here.
This only works for about the first 3 days of life – after that, the feather growth on each chick will be about the same.
Pullets in some breeds grow their primary feathers faster, so their secondary feathers will be shorter. Young roosters will have feathers about all the same length.

Feather sexing

This is also sometimes breed specific, so if you don’t notice that some chicks grow feathers faster than others, don’t worry, you still might have pullets!
Once the chicks are older – about 12 – 16 weeks, you’ll also start noticing young roosters develop saddle feathers – which hens won’t have. Here are more tips on caring for chicks from 7-16 weeks old.

Down Color

Some breeds will produce chicks with different color down or different markings based on their sex.
For example, Black Sex Link and Red Sex Link pullets will have different markings than roosters of the same breed. This is a characteristic selected for by breeders so they can tell the sex of the chicken right after it hatches.
In this cross, male chicks will have a white dot on their head while female chicks will be solid black.

Sex link chickens don’t necessarily breed true – so if you cross a black sex link rooster with a black sex link hen, there’s no guarantee the resulting chicks will also be sex linked.
This is, again, breed specific – so it will only work with chicks of certain crosses.

Examine Behavior

Now, this is just drawn from my own personal experience, but I believe you can also start to tell the sex of baby chicks based on behavior.
Naturally, this isn’t universal, and pullets might exhibit some of the behaviors we’ll discuss, but I’ve noticed over the years that roosters will do somethings that pullets naturally wouldn't.
Now let me explain. The stink eye is when you look at a chick, and they look up at you, cock their head to one side, and stare you straight in the eye.

I’ve noticed that it’s typically roosters that are this bold. Pullet chicks tend to not be so aware of their surroundings, or look to other chicks for behavioral guidance and security.
You might also notice some chicks fighting earlier in their lives than others. For example, you might notice them flying up at each other, bumping chests like football players, then going back to their corners.          
In my experience, these are young roosters testing their strength against other roosters.

Listen For Crowing

Something else you might notice is young chicks testing out their lungs. Young roosters will sometimes crow very early in life – as early as 4 weeks in some cases.
While there are hens that’ll crow, it’s not usual, so if you notice your chick trying to make a little baby crow (maybe succeeding, maybe not!), you might just have a young rooster on your hands.
While nothing will ever be 100% certain except vent sexing, hopefully now you no longer wonder how to sex baby chicks.

What to do when introducing new chickens to your flock

  It is joy of all chicken owners oor farmers  when his flock is growing, and adding new chicken is one of the way in  making flock growing
Introducing new chickens to an already established flock can be stressful for both the birds and you. The new flock will need to establish a new pecking order, which can be brutal for everyone involved.

Through much experimentation over the years, we’ve developed a great strategy for new flock initiation. This strategy allows the birds to get used to each other gradually, so there’s less stress.

There are plenty of good ways to go about introducing new chickens to an established flock. But when we’re introducing chicks to the flock (or pullets) this is the method that works for us every time.

Introducing New Chickens to the Flock
Step One: 

Quarantine

All new flock members must be quarantined before being added to an established flock.

Quarantine is done to ensure that the new flock members aren’t bringing in diseases or pests to your flock. They’ll need to be examined daily to look for signs of mites and lice, as well as common poultry diseases. Quarantine should last for at least a week.

To quarantine new chickens, keep them in an isolated area where they aren’t sharing space with the existing flock. A dog cage inside the house or garage will work well. Be sure to wash your hands thoroughly in between handling new birds and the rest of the flock.
After the quarantine period is up and you’re absolutely sure your new flock members aren’t introducing any diseases or pests, you can begin introducing new chickens to the rest of the flock.

Step Two: Cage Inside of Coop

Place the new birds in a large animal cage inside the coop. If you don’t have a cage, fence off a corner of the coop for the new birds, making sure they’re protected on all sides.
Placing the cage in a corner is a good idea, so only two walls of the cage are exposed to the rest of the flock.

The existing flock members will come to investigate the new additions, but won’t be able to get too close. This will allow everyone to adjust to each other gradually.
Keep the new flock members inside the cage for the first 3-7 days. If it seems everyone is getting along well after three days, move onto step three. If there is still a lot of pecking going on through the cage, keep them in there for a few more days.

Step Three:
Free-Range Time
When step two is complete and the birds are all comfortable with each others presence, it’s time to let them free range together.

Let the old birds and the new birds out to free-range together for at least a few hours a day. This will give them time to interact with each other, and space to get some privacy if they need it. If you don’t free range your flock, let the new chickens out of their cage and into the run for a few hours a day.

If the new birds don’t rush out of the cage the first time you open it, give them time. They may be frightened of the newfound space, but they will come out when they’re ready.

When the birds aren’t free-ranging together, keep the new flock members in the cage, including at night.

Continue letting the flock free-range together for a week or so. Timing is different for everyone, so when all seems well, move onto step four.

Step Four: Cage Door Open

After a week of free-ranging together, open the door to the cage and leave it open. The new flock members can come and go from the cage as they please. It will still be a safe place for them to go when they need, and they’ll likely still sleep there at night. The entire flock can now mingle together whenever they please. Continue letting them out to free range together.

Don’t be alarmed if your new chickens still get pecked at once in awhile. This is totally natural and necessary as the flock adjusts.

Remember that chickens aren’t the same as people, and their social order works in a different way. This method is meant to make this transition easier for everyone, but there will still be some adjustment before the birds are all comfortable with each other.

Add a second roost in the coop if necessary. The new birds may get pecked when they start trying to roost. Give some extra room so everyone can roost comfortably.
Provide places for new flock members to get some privacy. Placing roosting bars high up in the run can allow a safe place. Another option is to leave covered spaces inside the coop for birds to retreat to if they’re getting picked on.
Keep an eye on the new birds and look for signs that they’re getting pecked too much. Missing feathers, wounds, or bleeding are a bad sign and those birds will need a little extra time and TLC to get established.
If you’re introducing chicks to a flock of adult birds, wait until they’re at least six weeks old, but eight weeks is better. The chicks can get killed by the bigger birds if they aren’t big enough to defend themselves.
If these above steps were taking you will have a save and diesease free flocks.


.


MEN LOVE WITH THEIR MIND, WHY ?

Despite friendship and relationship, a man cannot love without his mind. Men are designed to love with their mind. A man you yet to know h...